Code Enforcement
Activity Dashboard
Activity Dashboard Overview
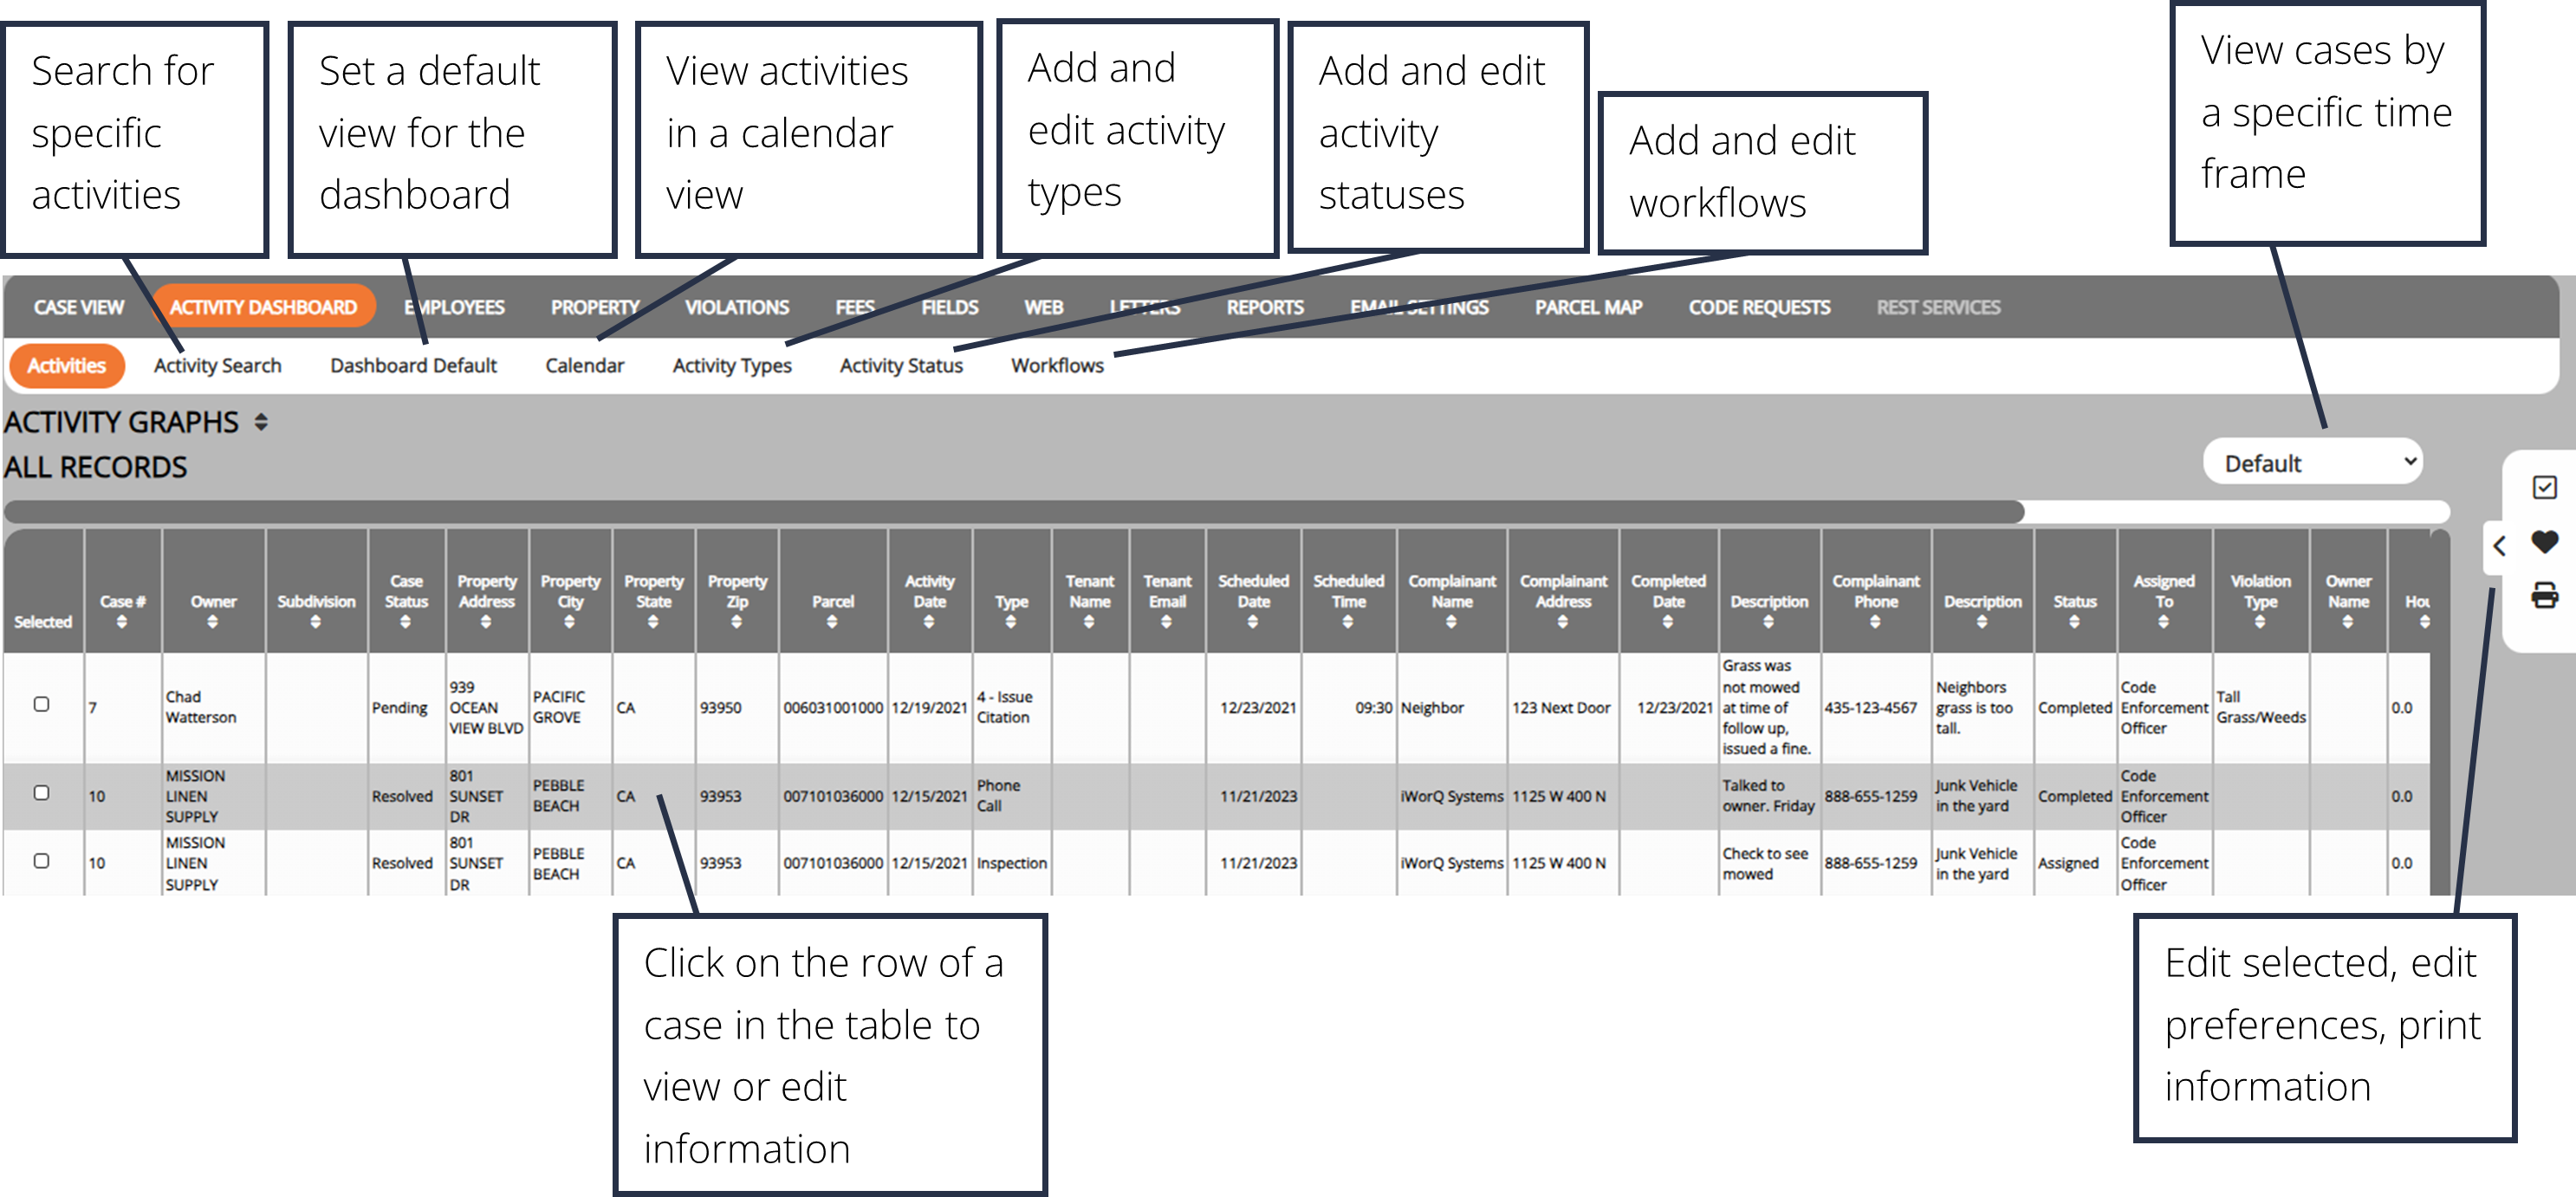
The Activity Dashboard displays scheduled activities associated with cases for a specified time period. Options to add Activity Types and Statuses are also included in the dashboard and can be added or edited as needed.
Activities
This is where you can view all the Code Enforcement Activities that have been added to cases
Activities on this page can be filtered by using the default dropdown option on the right side of the screen.
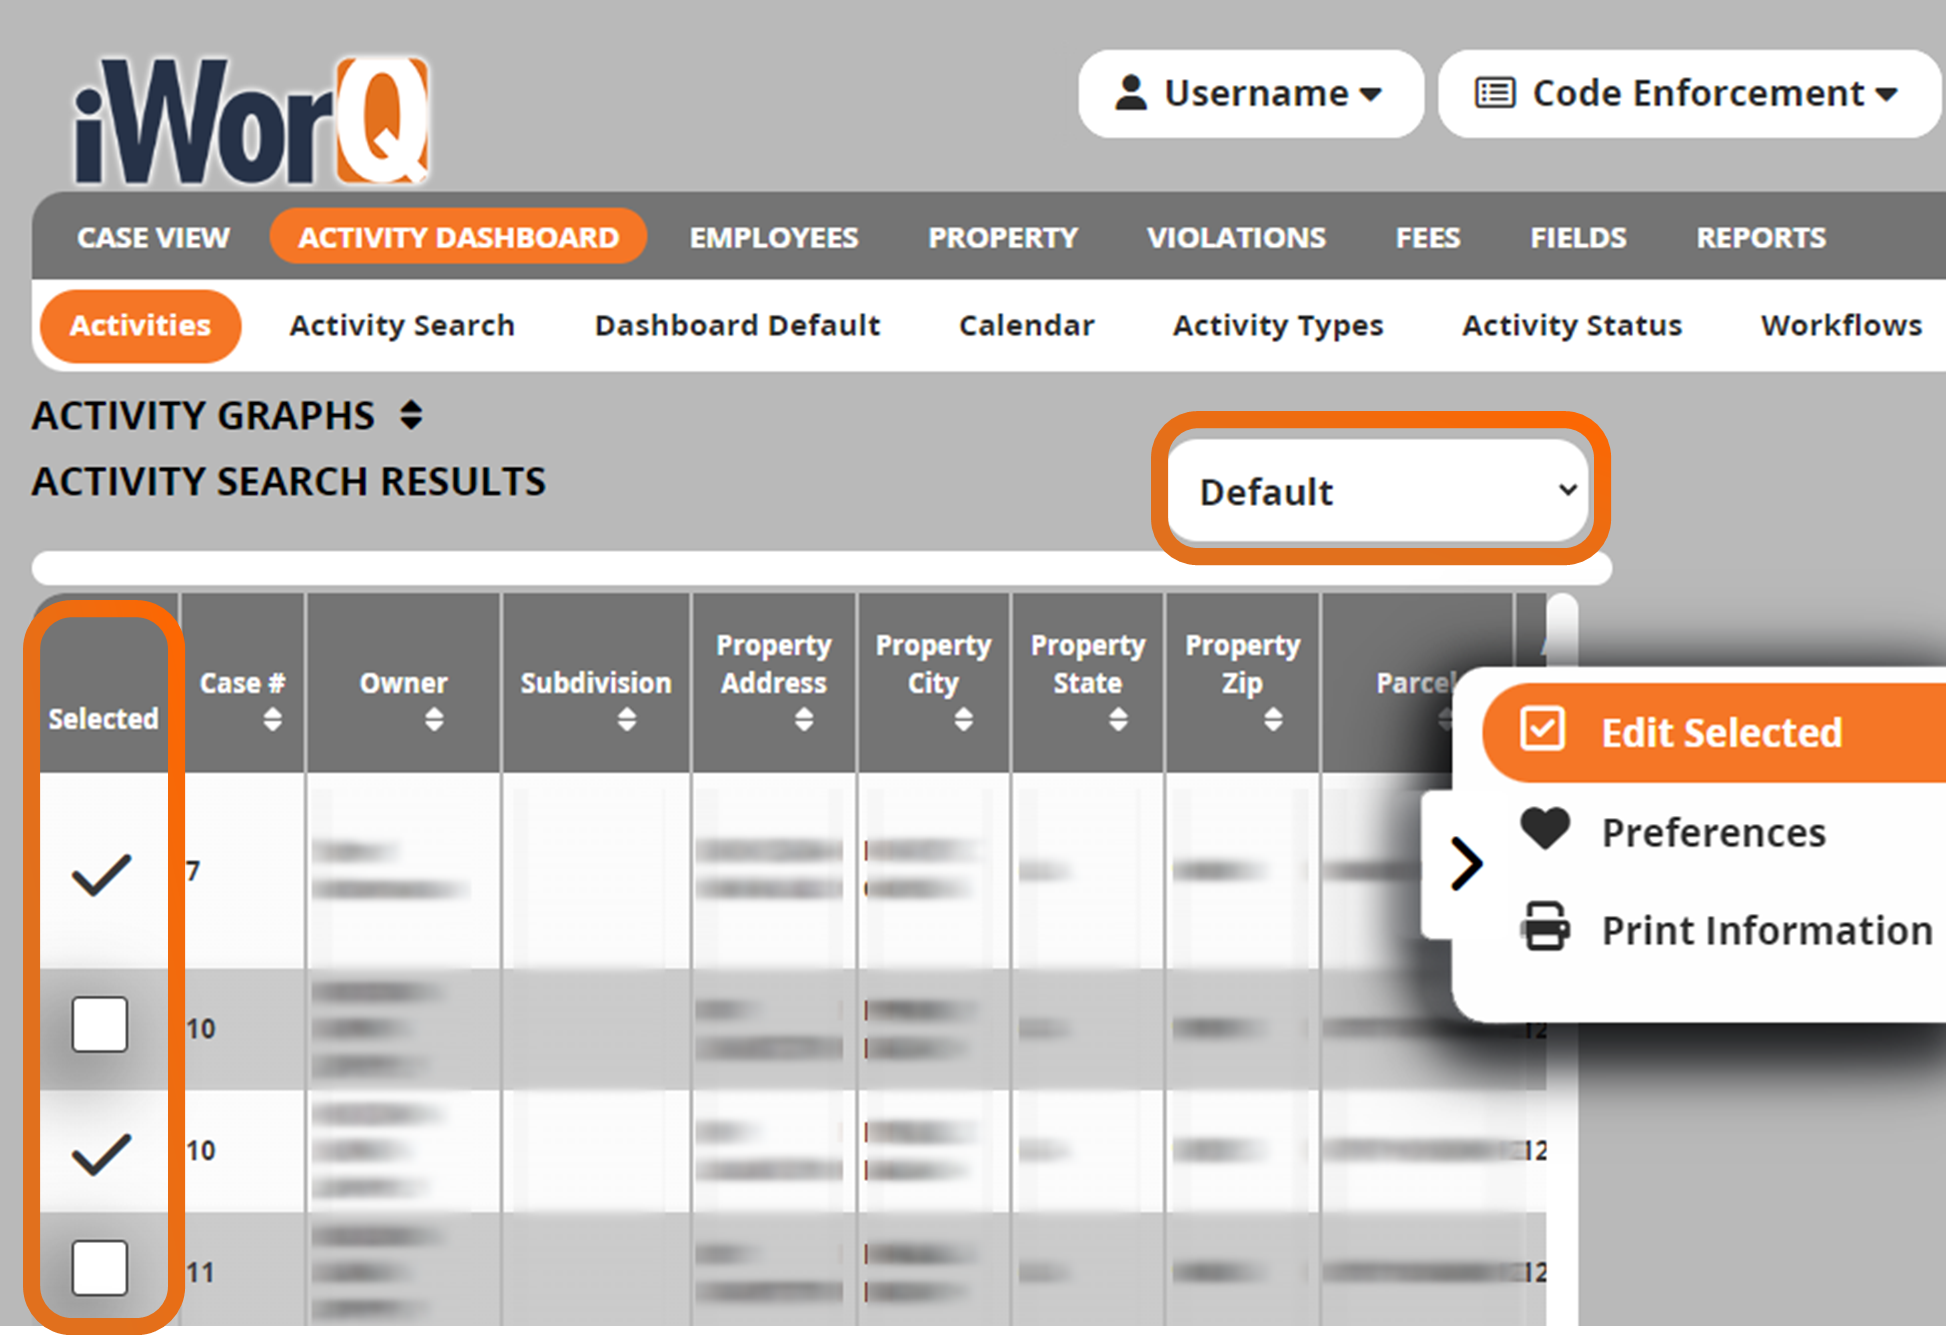
An edit can be made to multiple activities by checking the box next to the cases you want your edit to apply to and pressing the edit selected button on the sidebar menu.
Activity Search

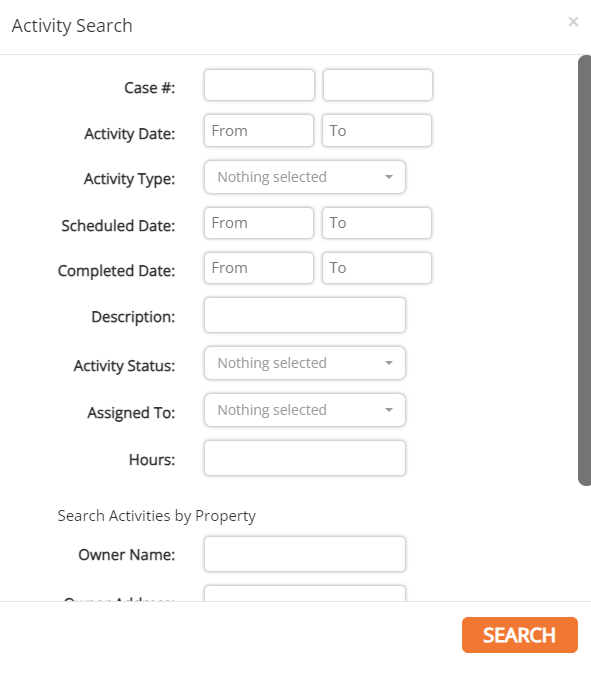
1. Click the Activity Search button in the sub-menu
2. In the Activity Search window, enter the parameters by which to search
3. Results will display in the table
Dashboard Default
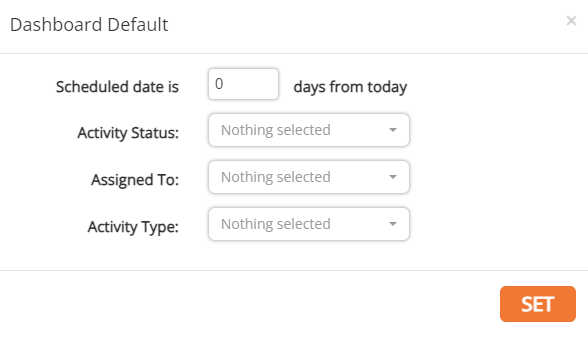
1. To set a default view upon entering the Activity Dashboard, click the Dashboard Default button in the sub-menu
2. Select the parameters for the default view
3. Click Set

Calendar
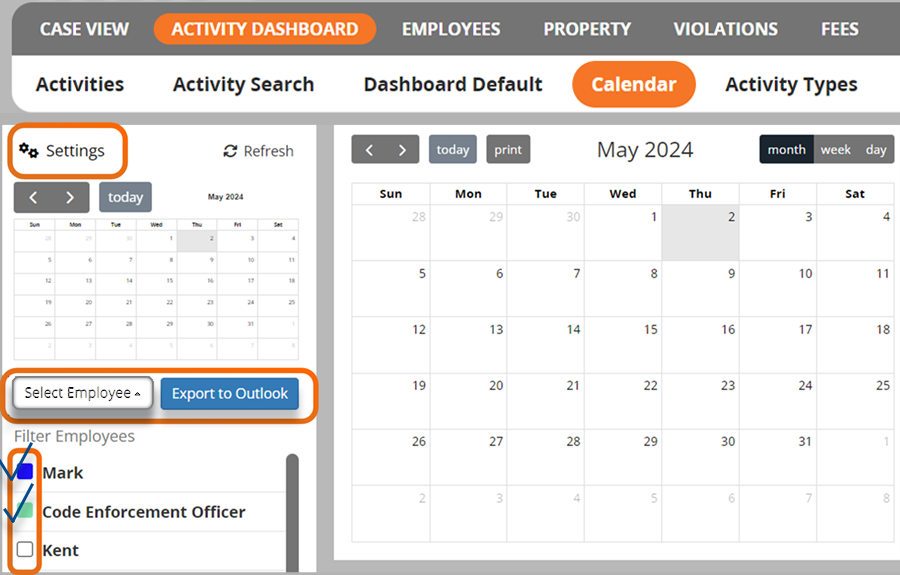
1. To view employee schedules, click on the Calendar option in the sub-menu.
2. Select the check box next to the desired employee(s) to see and compare upcoming schedules.
3. To export an employee’s calendar, choose their name from the drop down and click Export to Outlook.
Activity Types
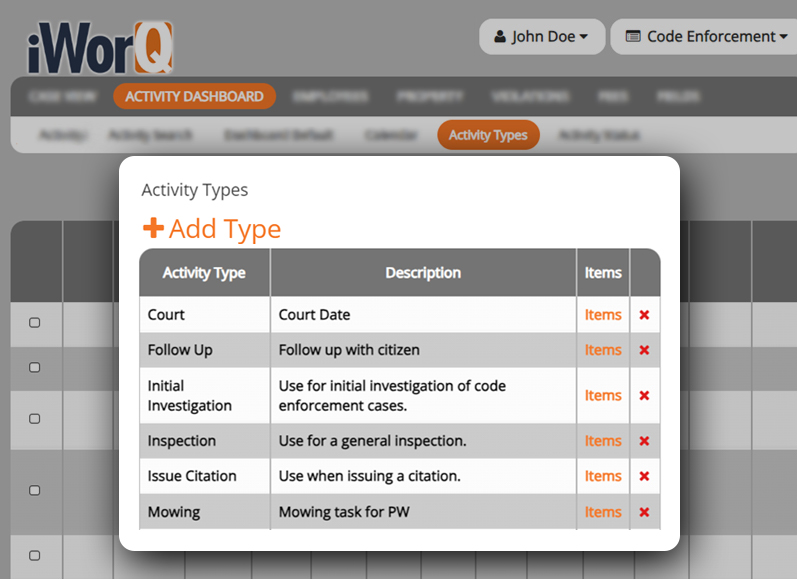
This is where you can add and edit activity types.
1. Select Activity Types from the Activity Dashboard sub-menu.
2. Click +Add Type
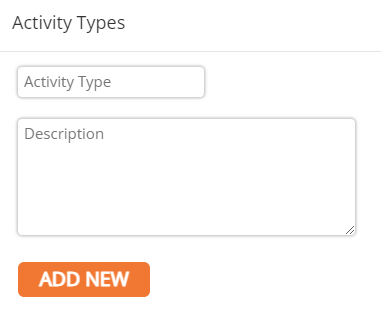
3. Enter the Activity Type name and description, then click Add New
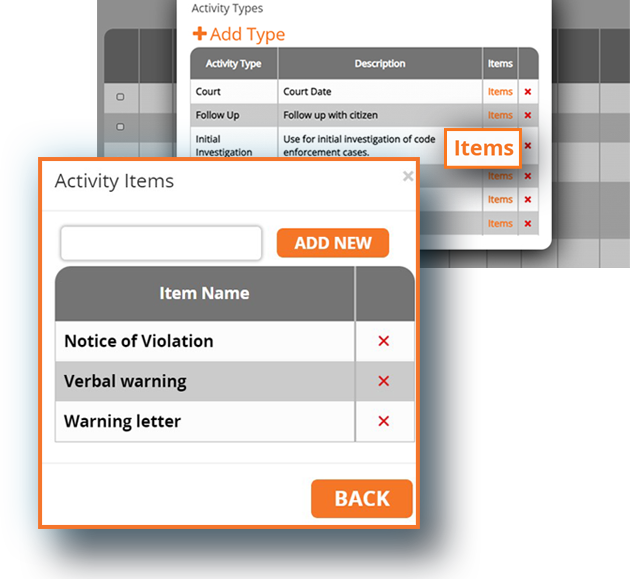
4. Items can then be added to the activity types by clicking on the items From there you can add new items by typing them into the box and clicking on “Add New”.
5. Delete an existing activity type by selecting the red X button.
Note: Activity Types and Statuses cannot be deleted if they are attached to a case.
Activity Status
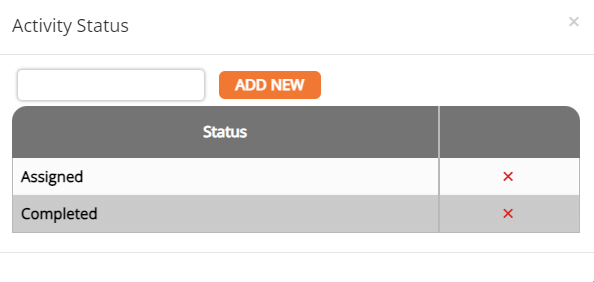
This is where you can add or remove status options for activities.
To add a new activity status:
1. Click the Activity Status button in the sub-menu
2. Enter a name for the new Activity Status and click Add New.
3. Click on an existing status to edit or click the red X at the end of the status’ row to delete.

Workflows
Workflows help ensure that everything is completed in the proper order.
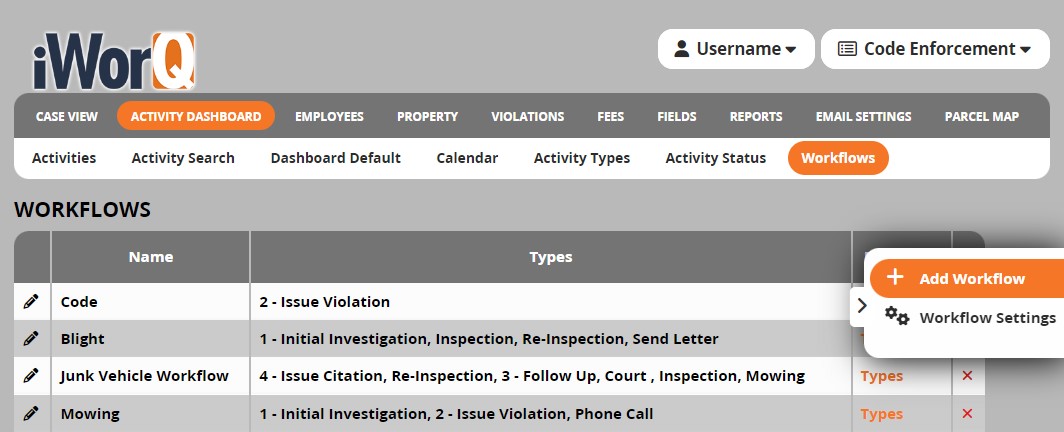
Workflows can be added by
Selecting the Workflows button in the sub-menu.
Select the +Add Workflow button from the side bar on the right side of the screen.
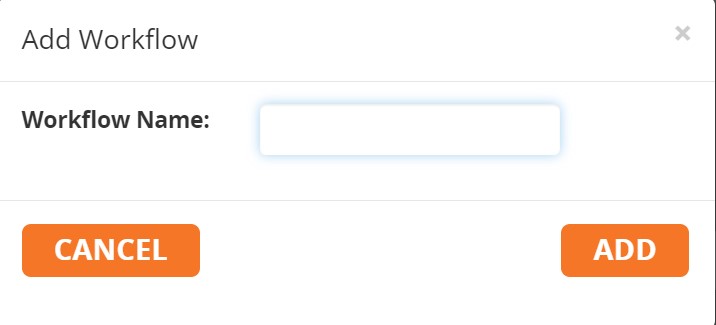
Enter in the name for your workflow.
Once the workflow has been created you can add “Types” which is where you set the order for steps to be completed.
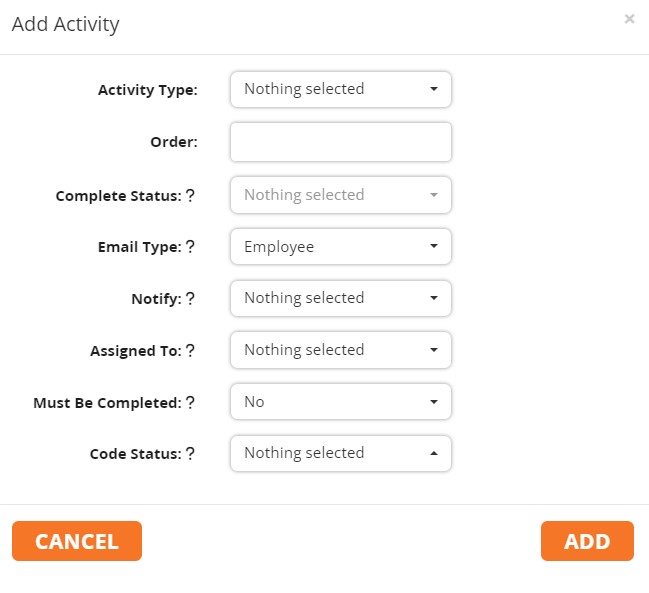
Additional types can be added by pressing the “Add Activity” button.
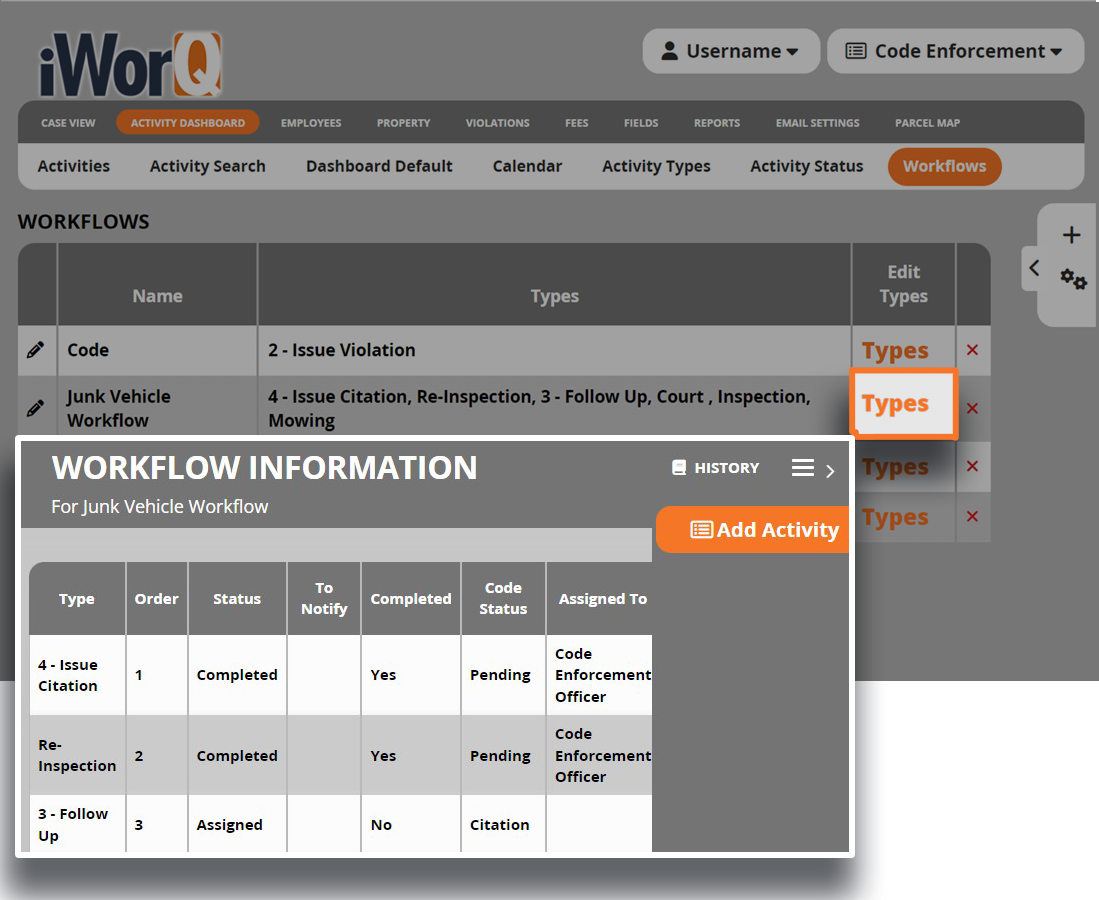
A popup window where you can add a new activity.
Fill out the form and include the order the step should be placed.
Then press "Add".
Code Enforcement Tutorials


