Code Enforcement
Property Tab
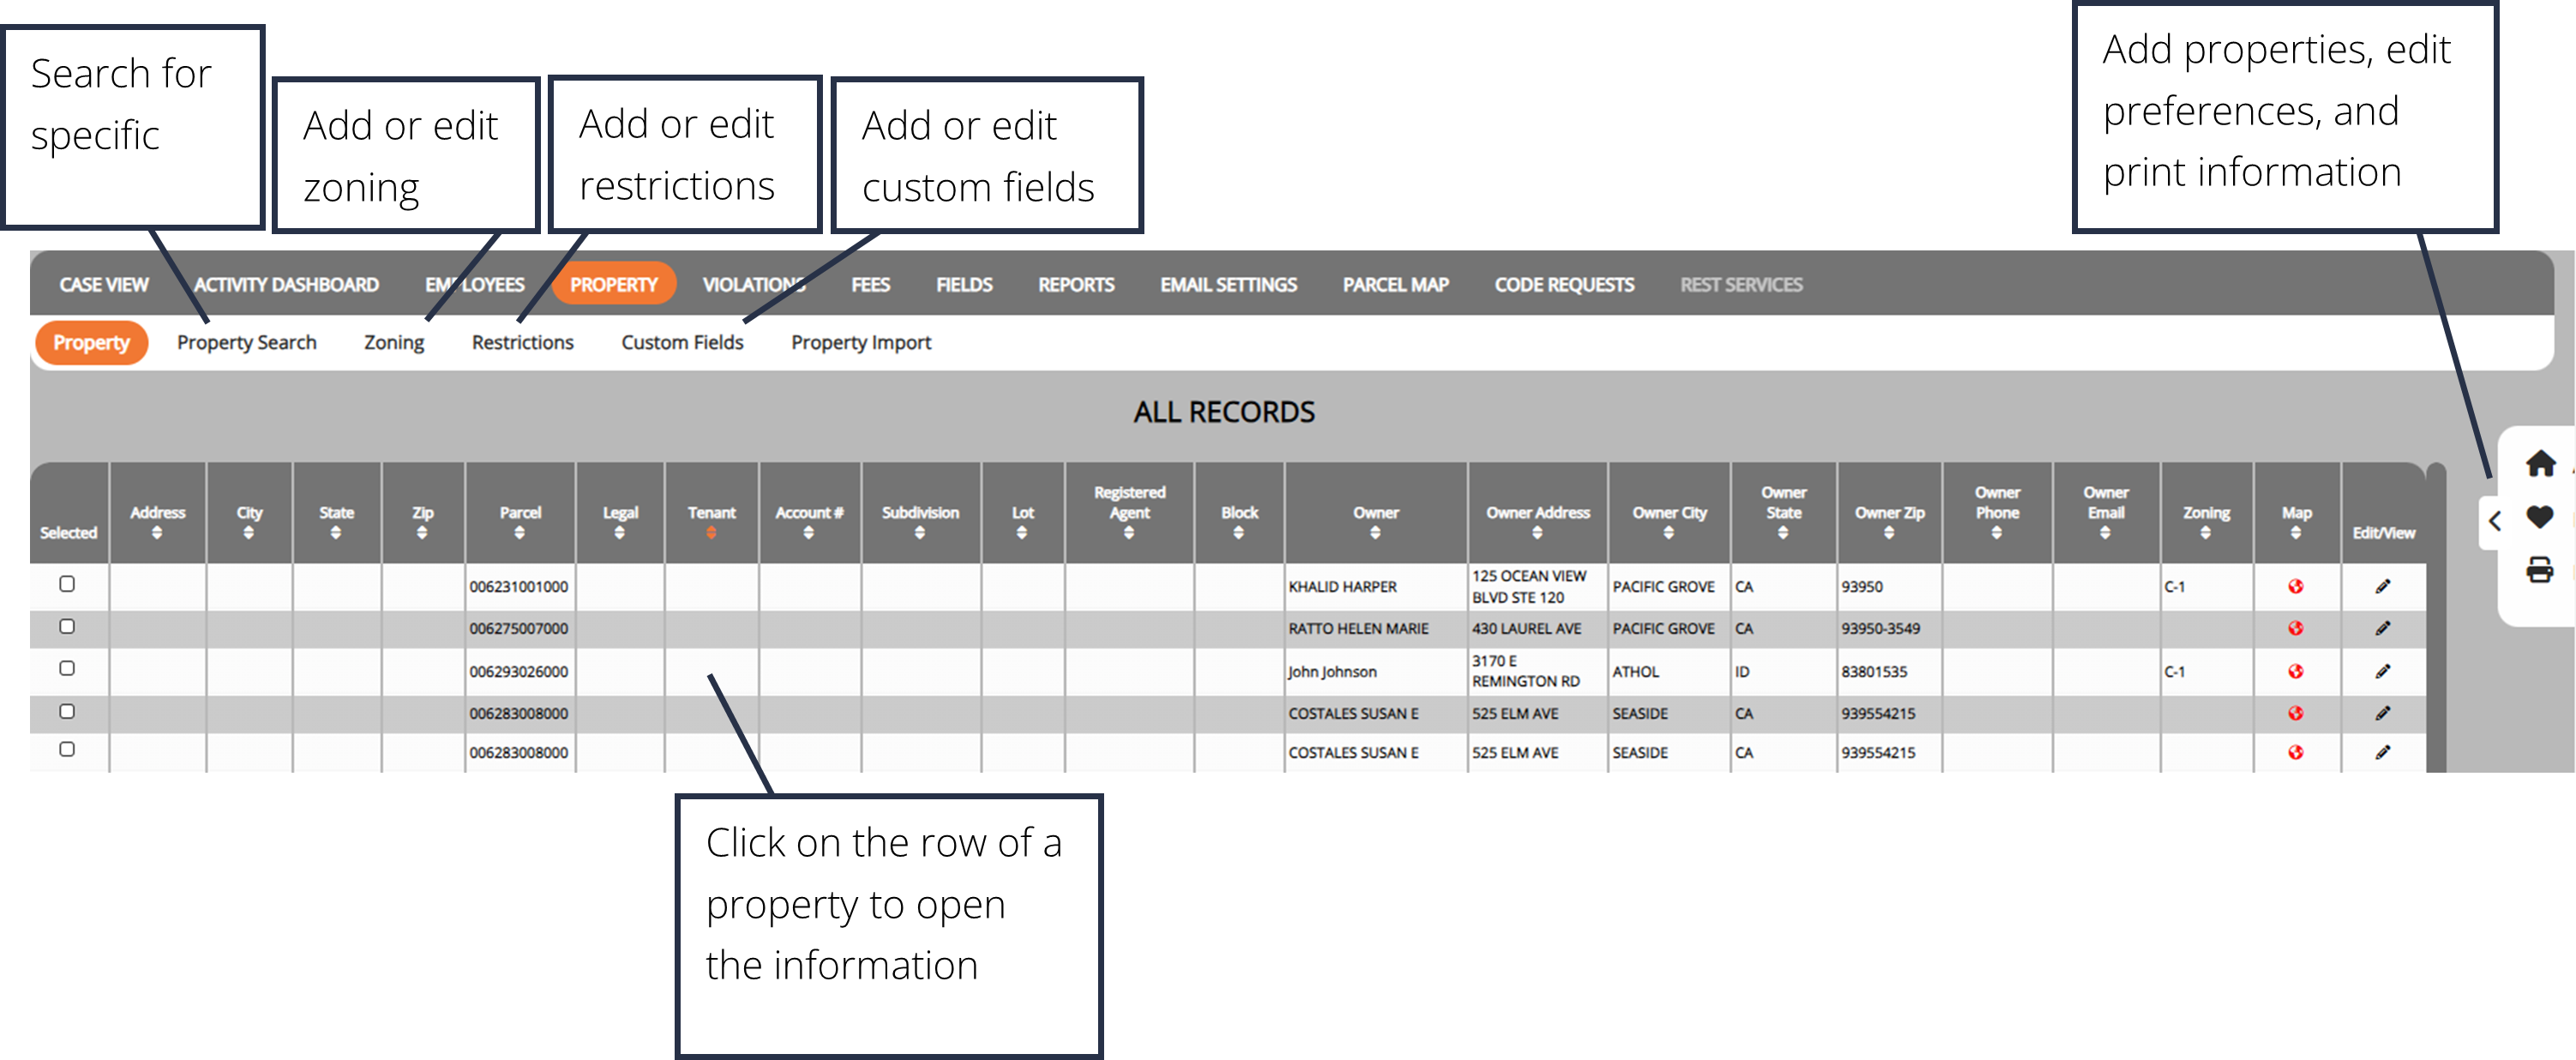
Property Dashboard Overview
This is where all the property records are listed.
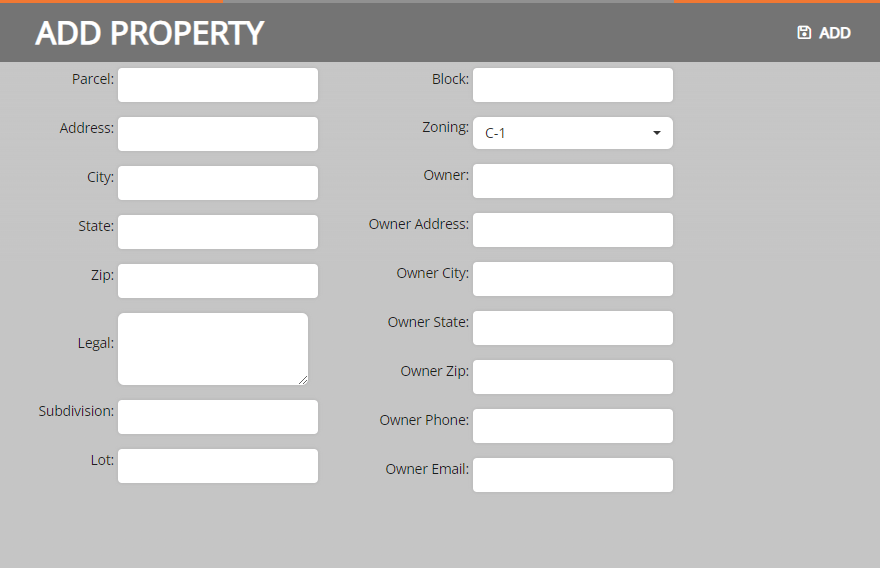
Add a Property
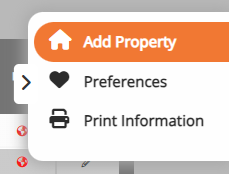
1. Click on the Add Property button within the side menu.
2. Fill in the property details.
3. Click Add.
Note: Mass updates to property information can be done by contacting Support at support@iworq.com
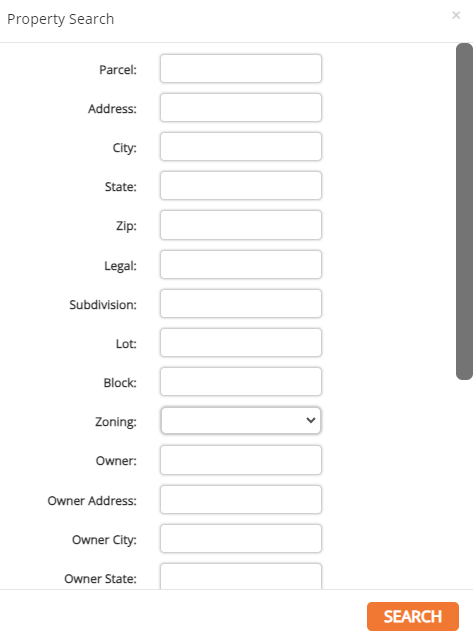
Property Search
Property Search allows you to search for specific properties.

1. Click on the Property Search button in the sub-menu.
2. Fill in the desired search criteria and click Search.
Note: Less is more when searching, the more criteria you fill out the less likely you will be to find the results.
Add Zoning
This is where you can add to the options in the Zoning field. This is one of the fields that you complete when you are adding a property.

1. Click the Zoning button in the sub-menu
2. Click Add New
3. Enter the zoning title into the Zoning Name textbox and select a Zoning Color
4. Click on an existing zoning label to make edits
5. To delete an existing zoning label, click on the red X at the end of the zoning label’s row in the table.
Note: Zoning labels cannot be deleted if information is associated with the zoning label

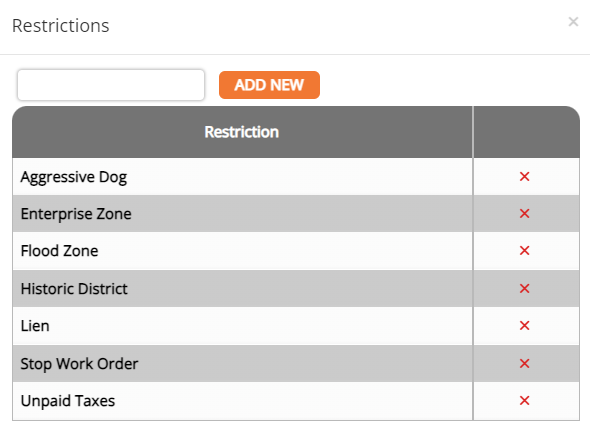
Adding Restrictions
This is where you can enter the bank of restrictions that can be pulled from when you are adding a property.

1. Click the Restrictions button in the sub-menu
2. Enter the restriction title into the text box and click Add New
3. Click on an existing restriction to make edits
4. To delete an existing restriction, click on the red X at the end of the restriction’s row in the table.
Note: Restrictions cannot be deleted if information is associated with the zoning label
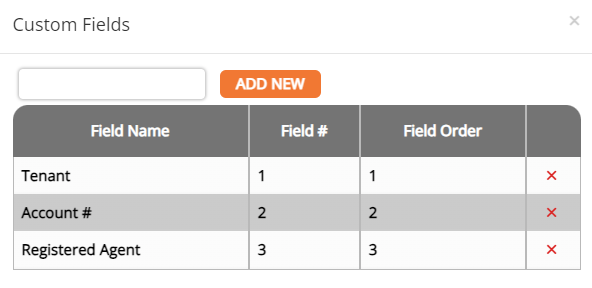
Adding Custom Fields
These pull into the property page under “other information.” This can be beneficial if there is an item unique to you that needs to be included.

1. Click the Custom Fields button in the sub-menu
2. Enter the custom fields title into the text box and click Add New
3. Click on an existing custom field to make edits
4. To delete an existing custom field, click on the red X at the end of the custom field’s row in the table.
Note: Custom Fields cannot be deleted if information is associated with the zoning label.
Code Enforcement Tutorials