Cross Connection
Basics, Tips, and Preferences
Locations Dashboard Overview
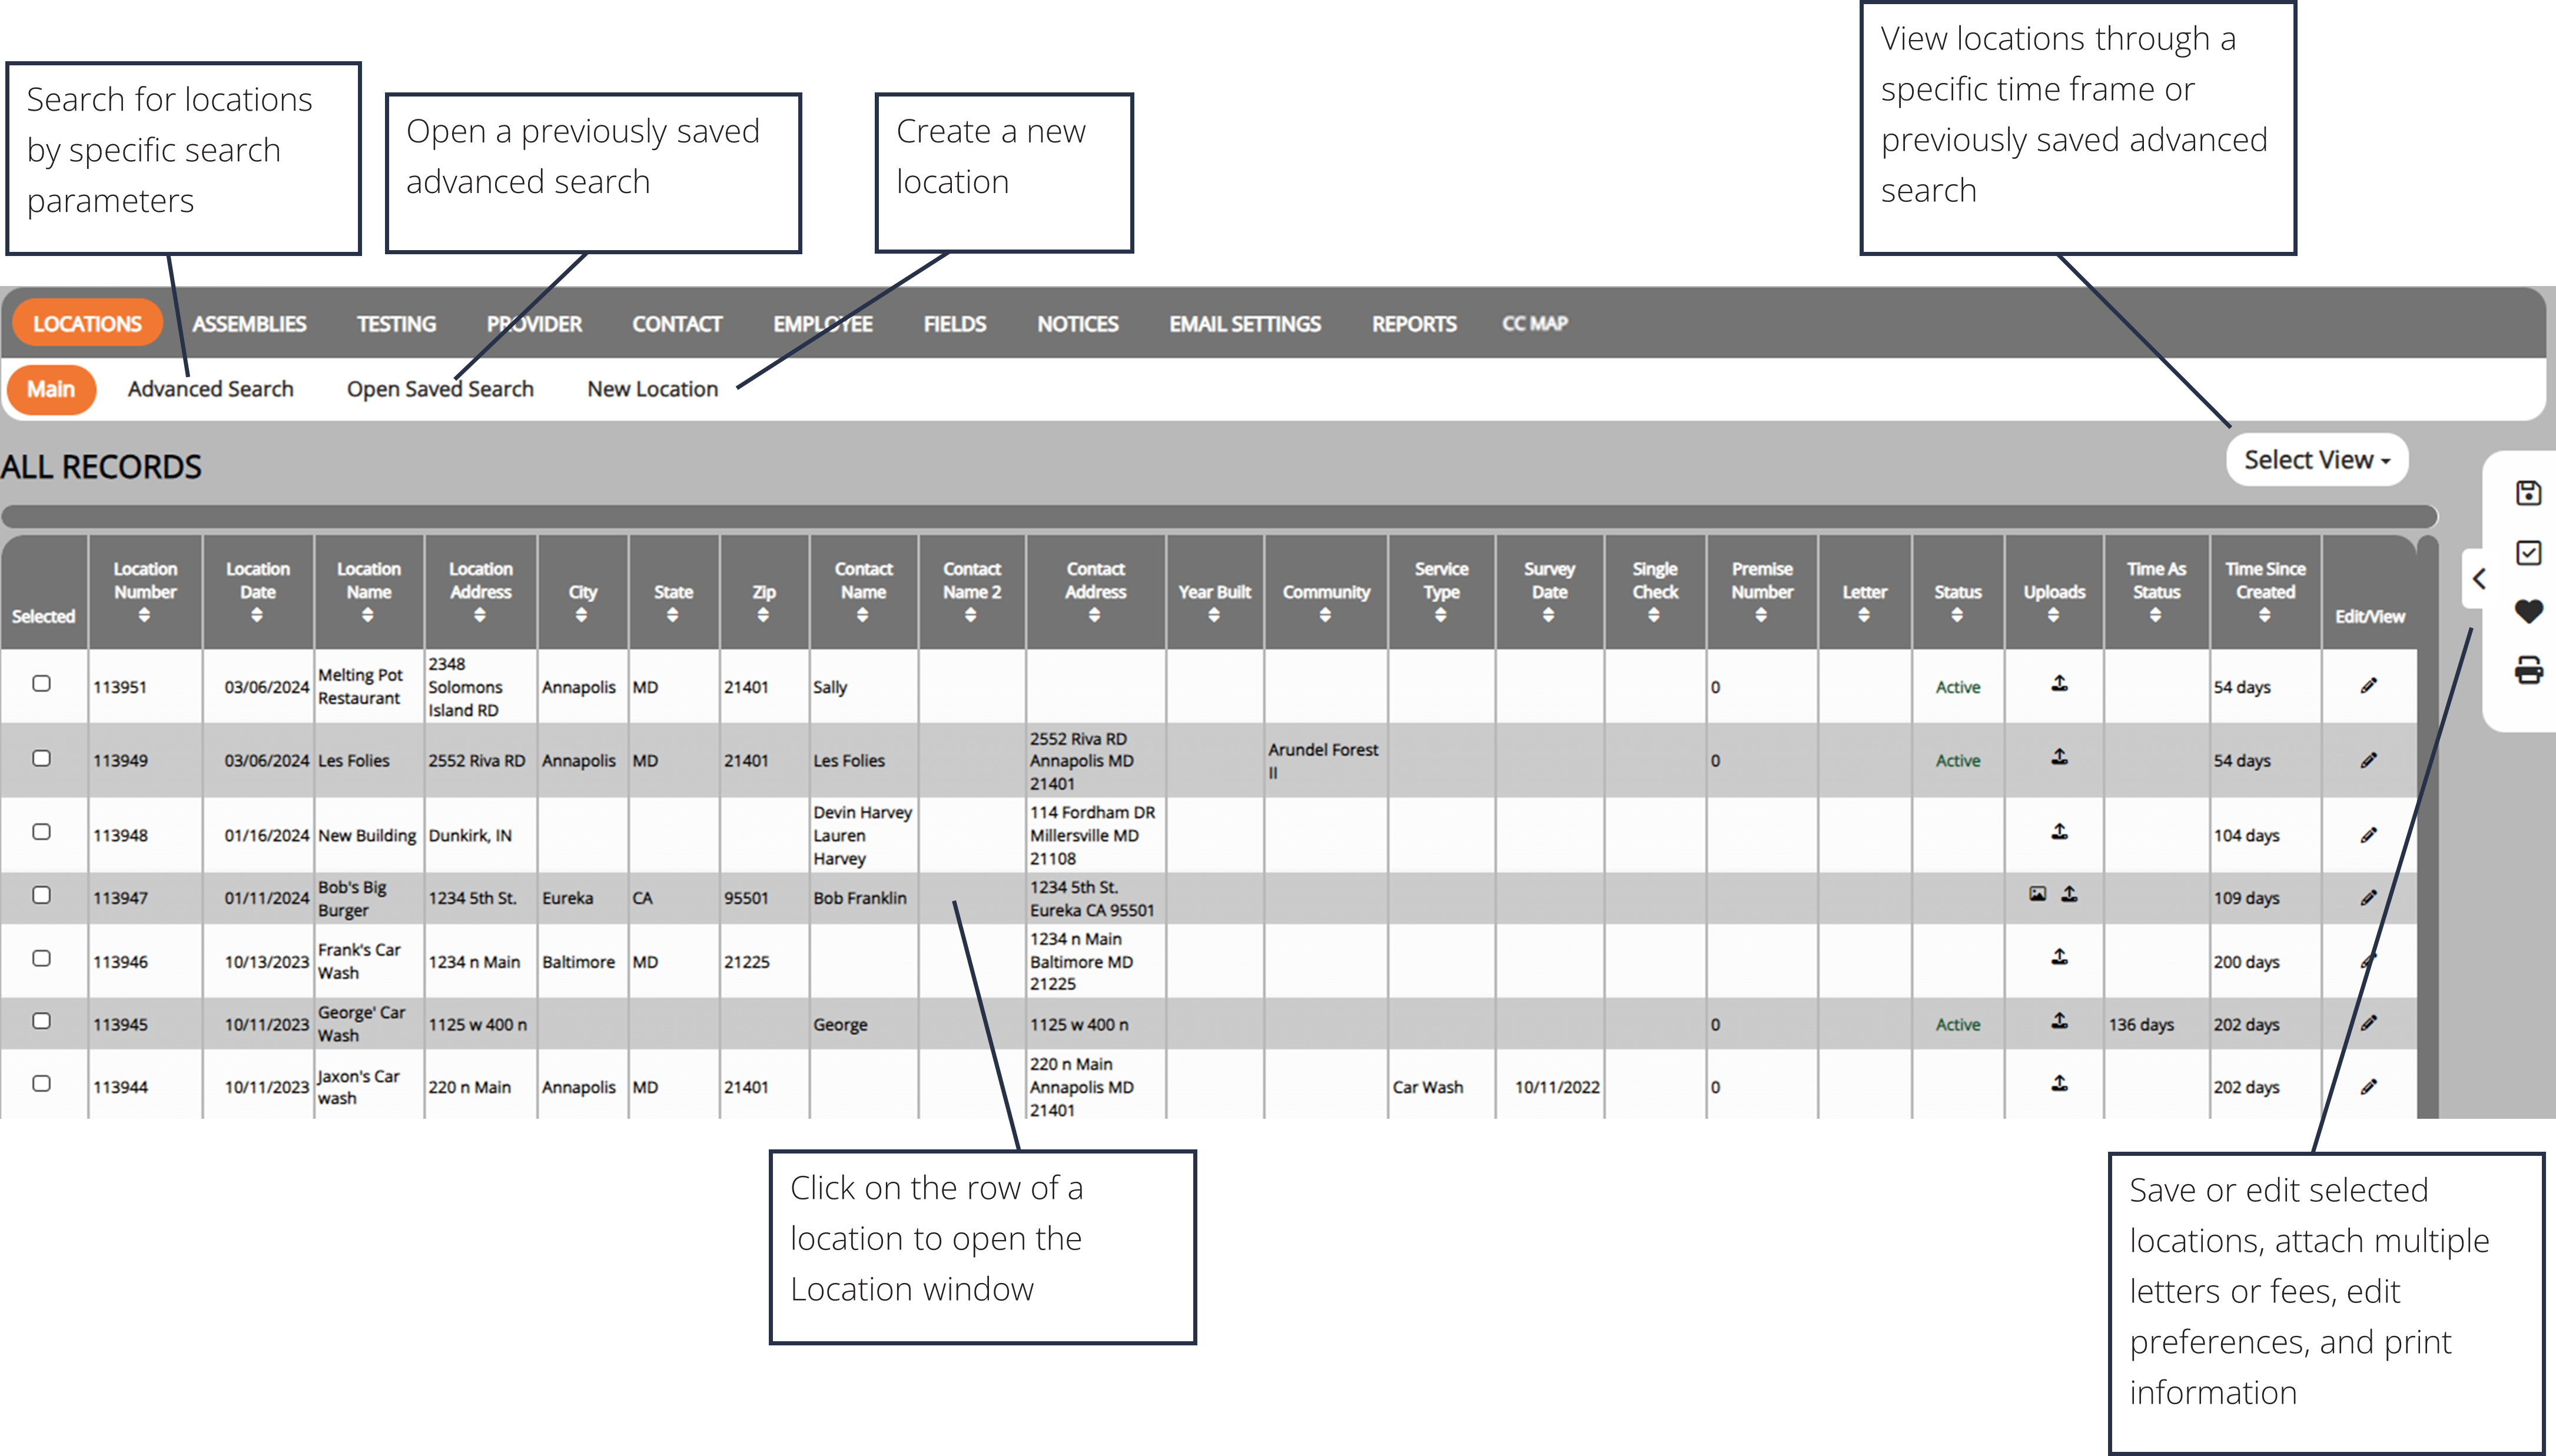
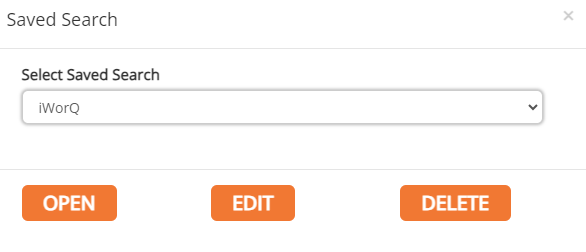
View Saved Searches

1. Click the Open Saved Search button in the sub-menu.
2. Select the saved search from the drop-down menu and click Open.
3. The user can also edit the search parameters of the saved search by clicking Edit.
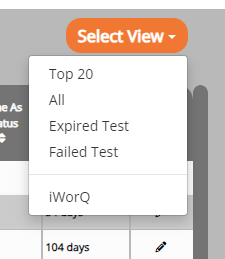
4. Alternatively, select the saved search from the Select View drop-down menu in the upper right-hand corner of the Records table.
Add A Location
1. From the Cross Connection application under the Locations tab, select New Locations from the sub-menu.
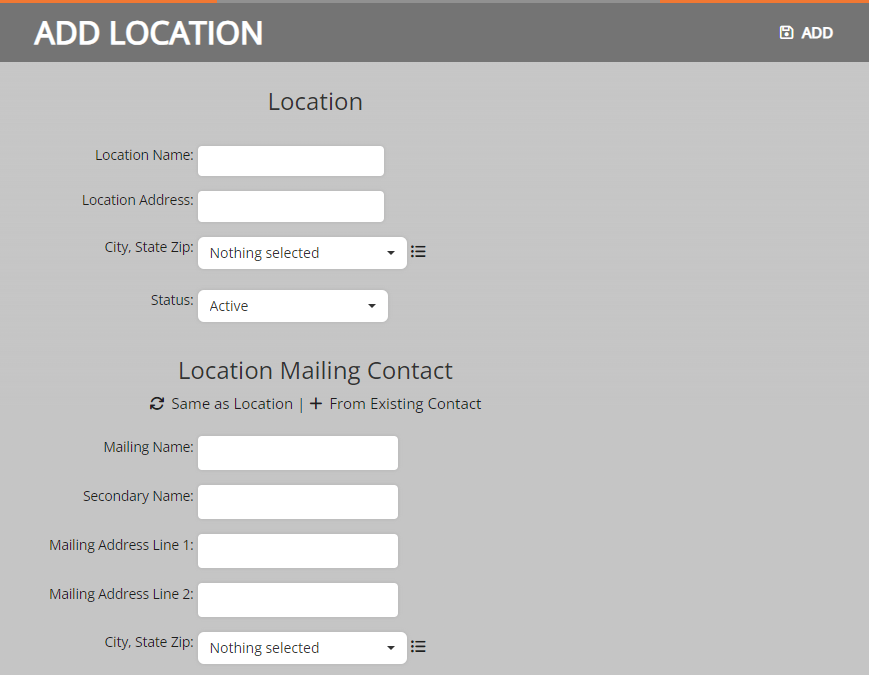
2. Fill in the necessary information.
3. Click Add.
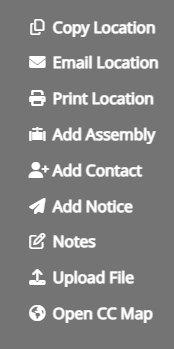
Editing Locations
After the location has been made, edits can be made and information such as adding assemblies, notes, contacts, and supporting files can be added.
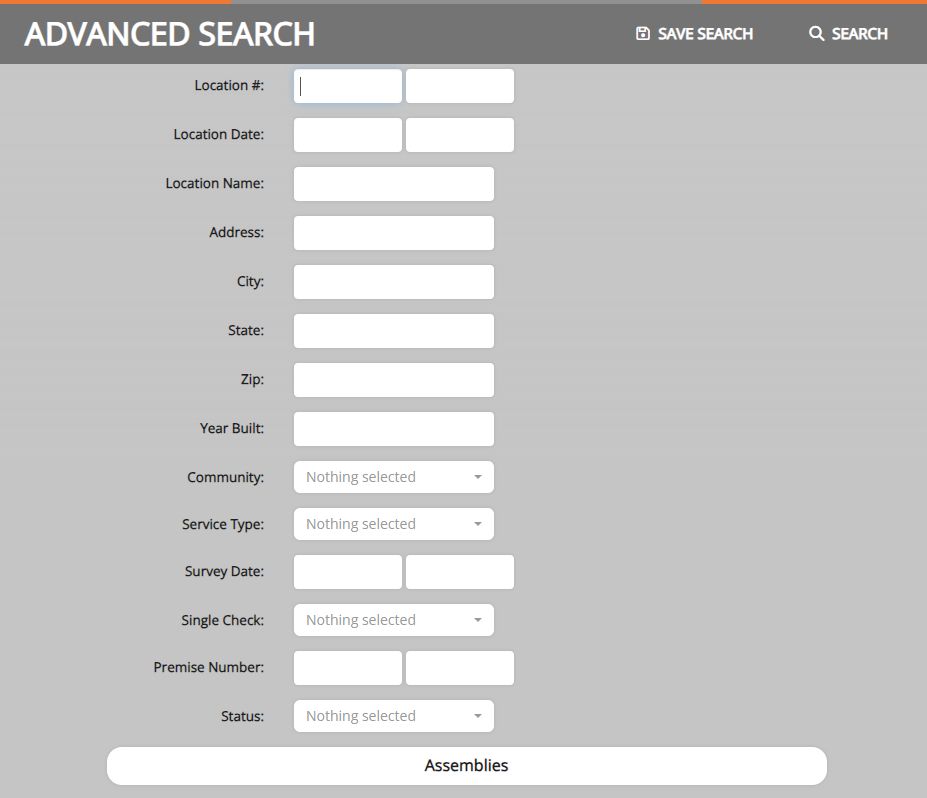
Advanced Search

1. Click the Advanced Search button in the sub-menu.
2. The Advanced Search allows users to search by any fields in the application. Enter the desired search parameters and click Search.
3. Searches can be saved for later ease of access. To save a search, click Save Search.
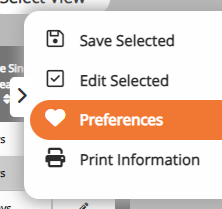
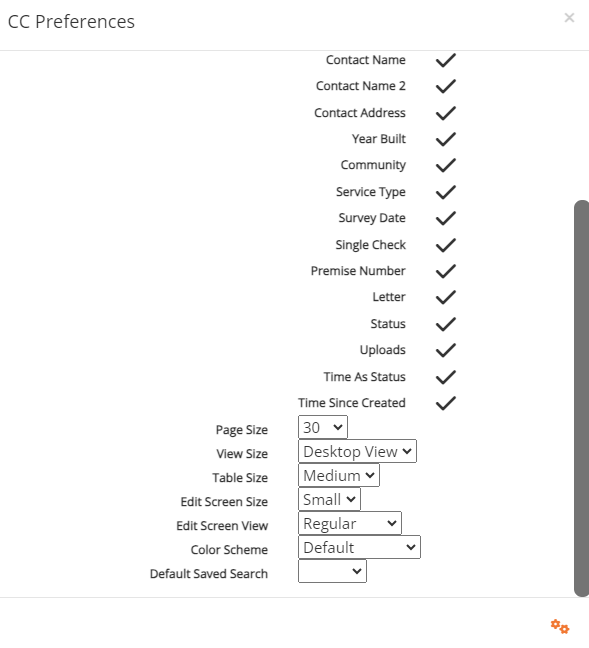
Setting Dashboard Preferences
Preferences can be set to customize your dashboard. To open the preference options, select the Preferences option from the side menu.
From within the preferences window, you can customize:
- How many lines of data you see per page (Page Size)
- The size that the information is displayed at (View Size)
- The size of the detail sections on the edit screen (Table Size)
- The color scheme you would like to use (Color Scheme)
- A default saved search to display (Default Saved Search)