Rental License Management
Inspections Tab
Inspection Dashboard
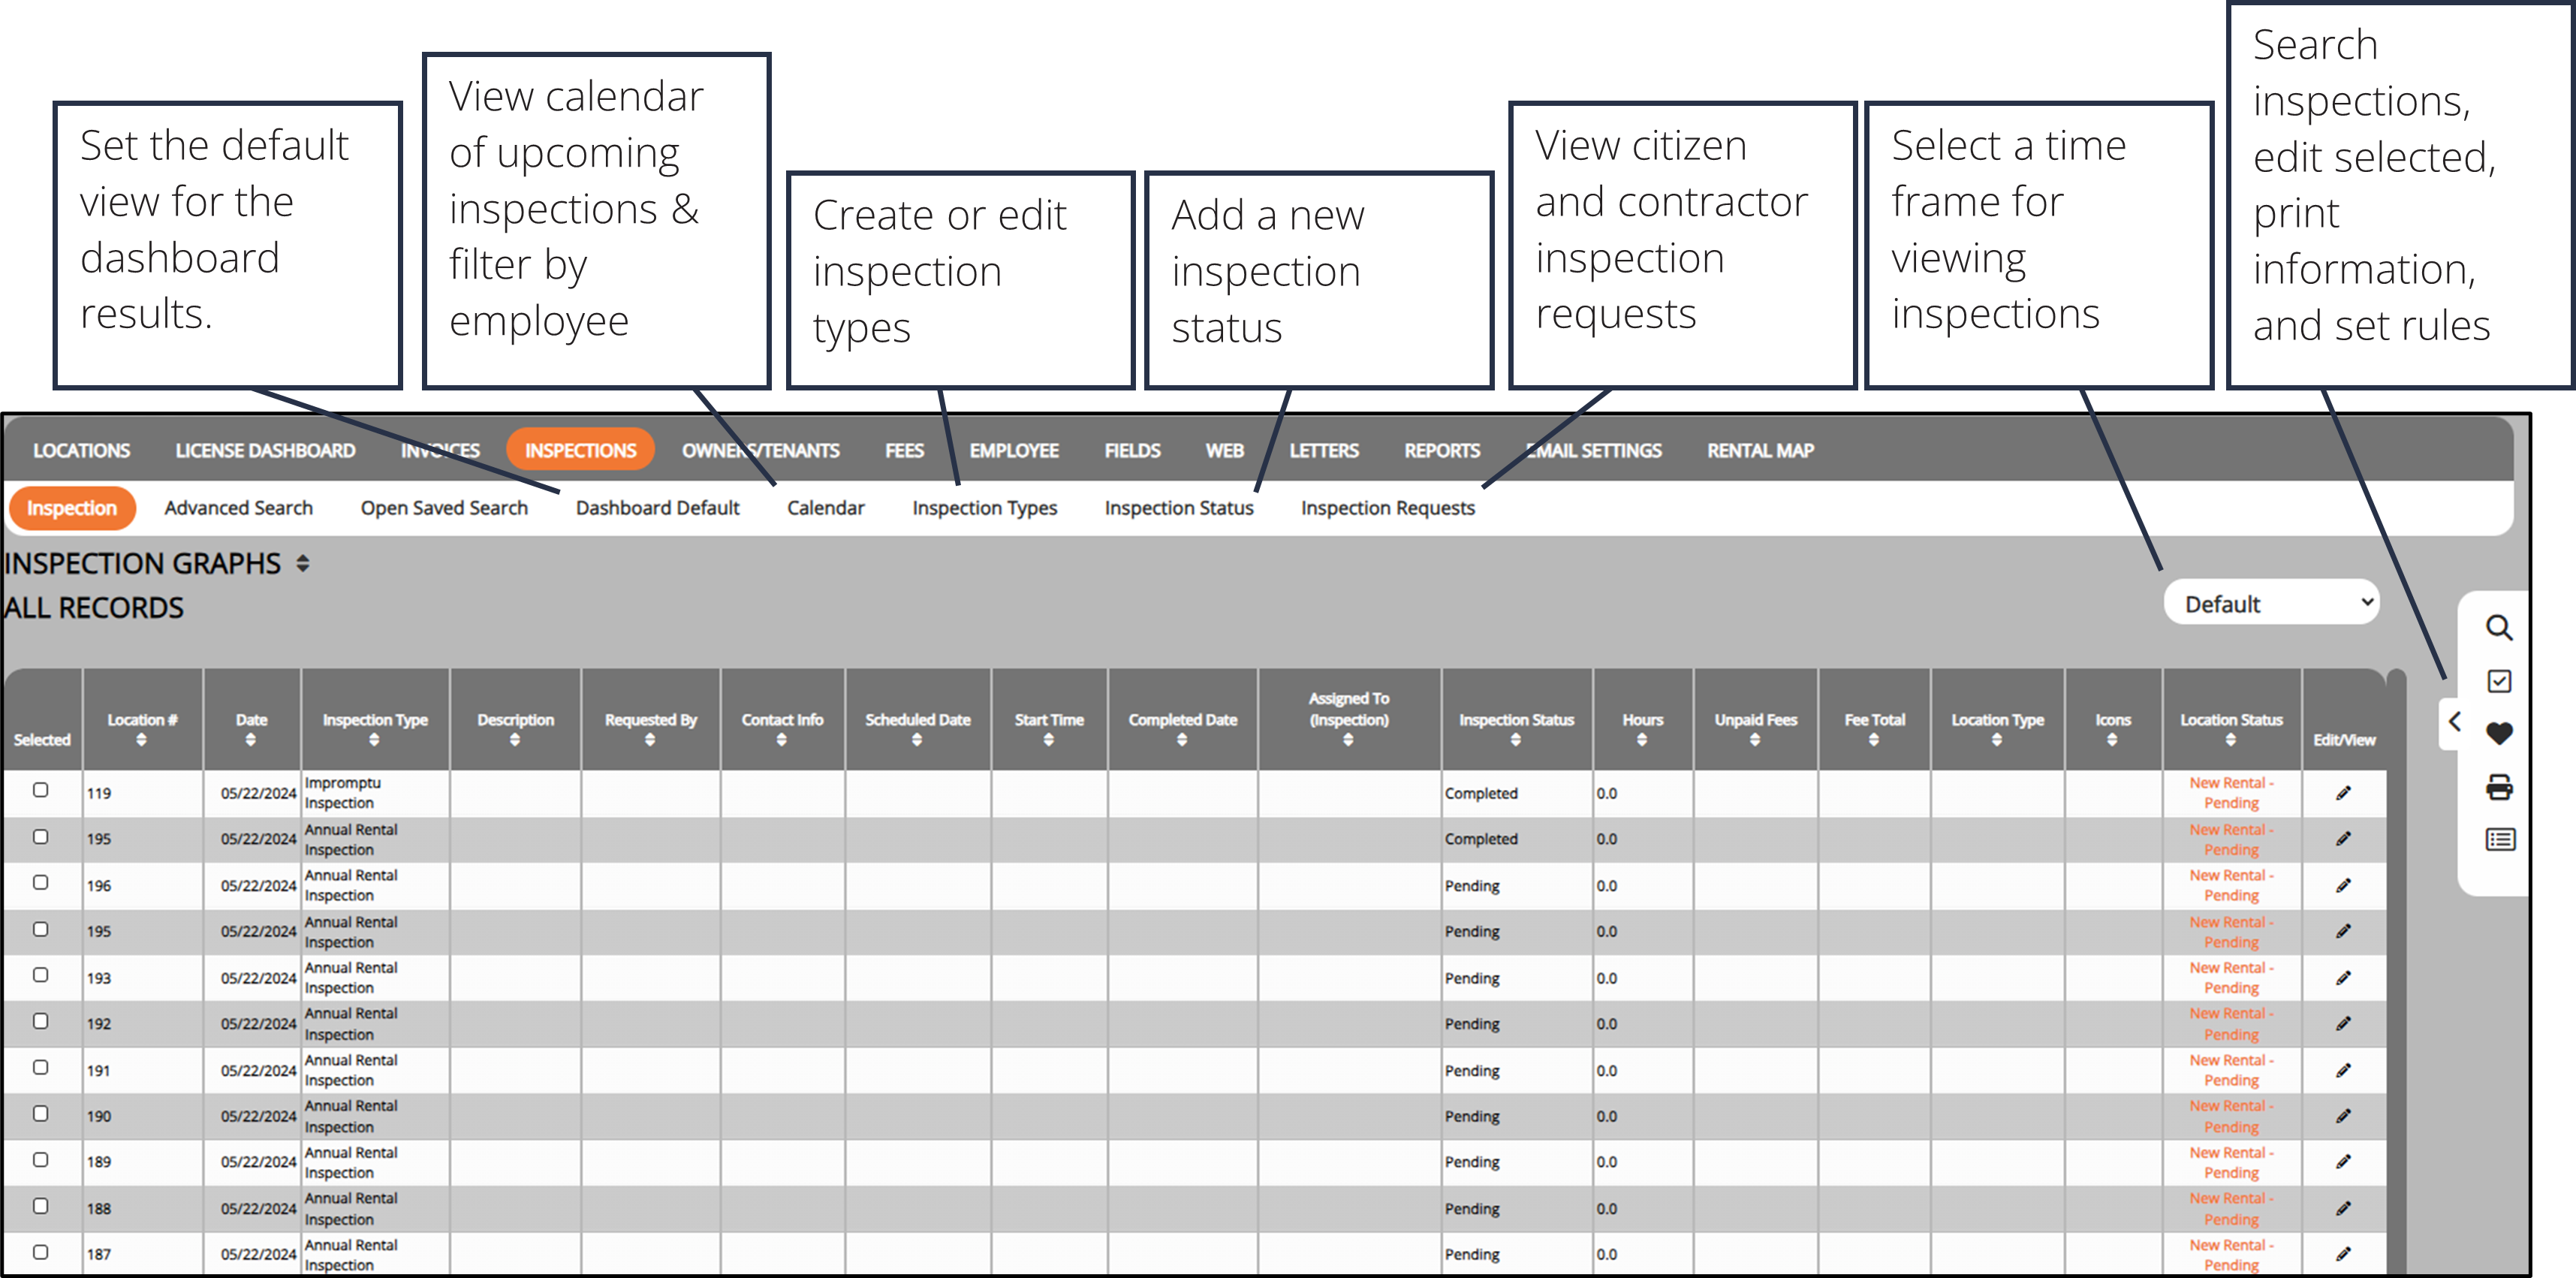
Dashboard Default
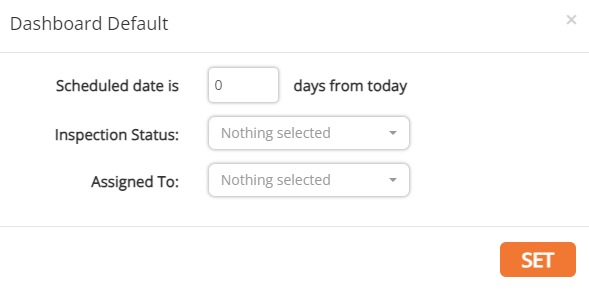
This allows you to set a default view for the inspection dashboard
1. Select the Dashboard Default button in the sub-menu.
2. Enter a set number of days before the inspection's scheduled date. Inspections within this range will be displayed.
3. Optionally, select which inspectors to display and what inspection statuses to display in the default view.
4. Click Edit.
5. The parameters of the Dashboard Default should display upon entering the Inspection Dashboard.
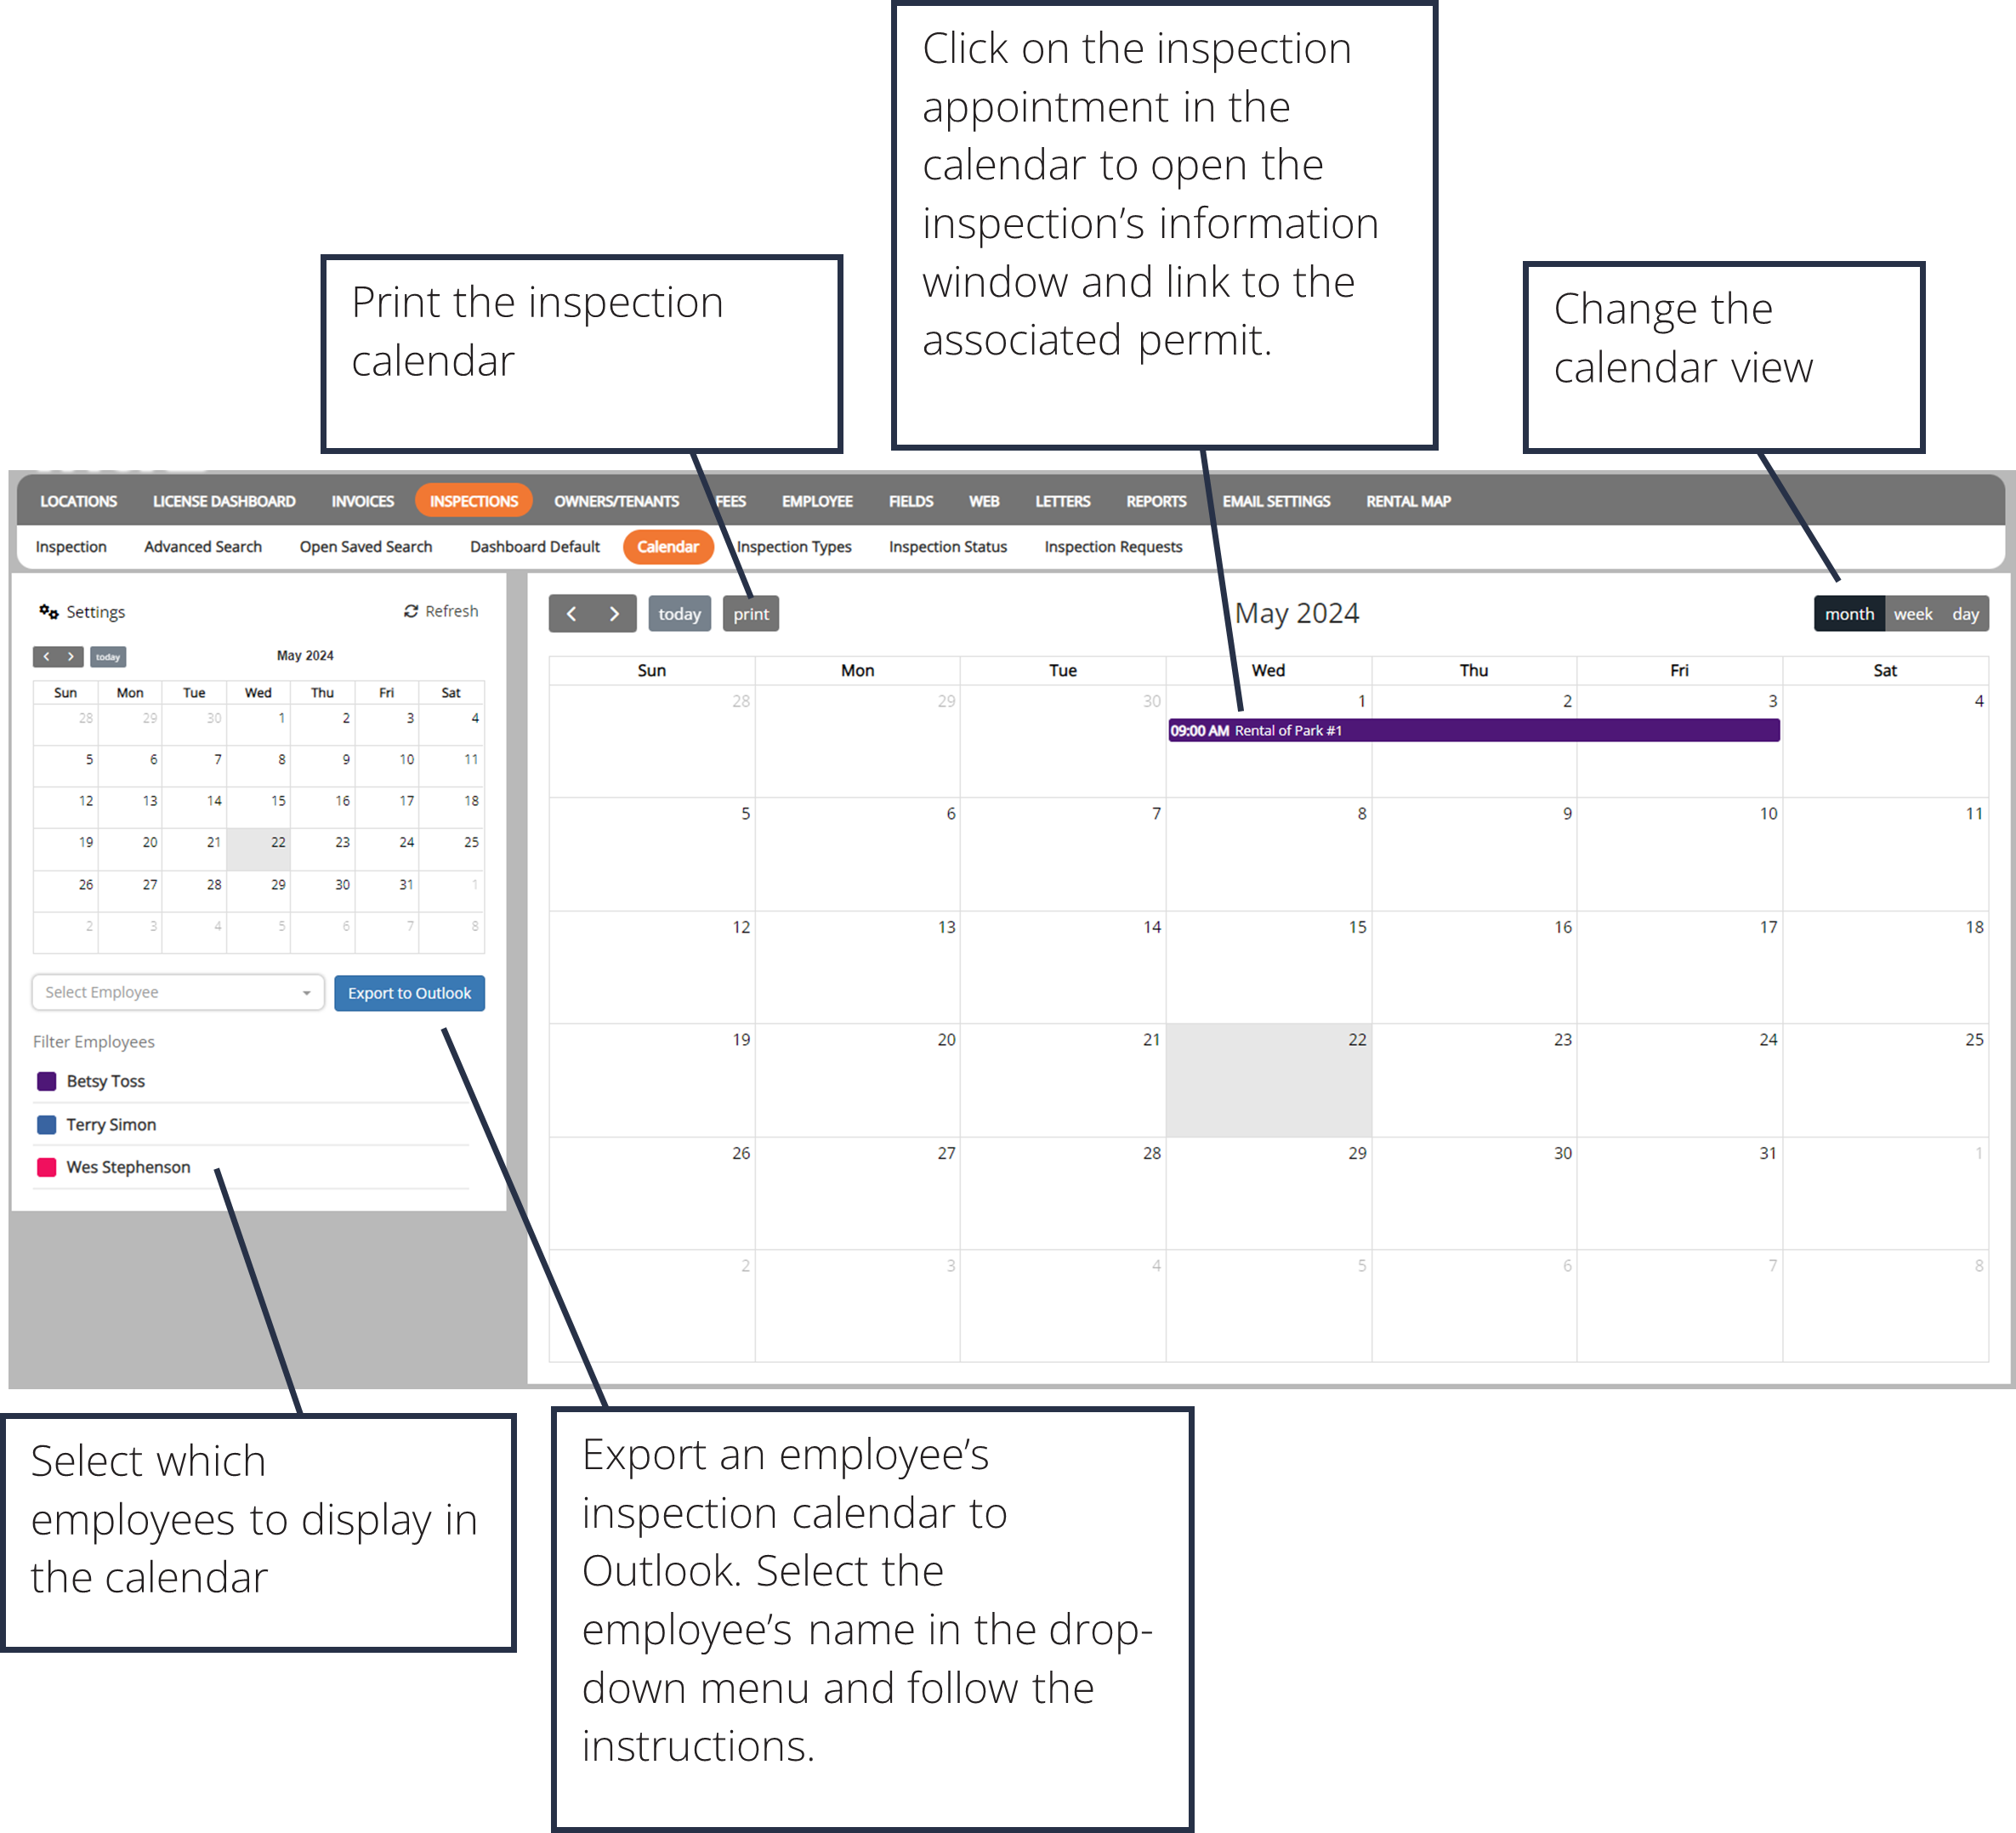
Inspection Calendar
Inspection Types
1. To add an Inspection Type, click +Add Type button from the right-side menu.
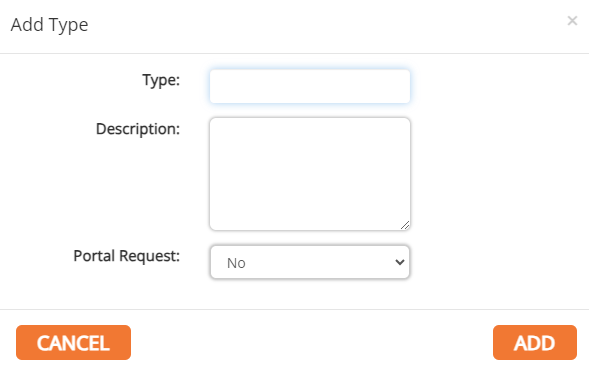
2. Enter in the inspection type title and a description.
3. Click Add.
4. To add items to the inspection type, click on the orange Items button in the row of the inspection type in the table.
5. Enter the new inspection item into the box and click Add New.
6. Click on the row of an item in the table to edit or click the red X at the end of an item's row to delete.
Inspection Status
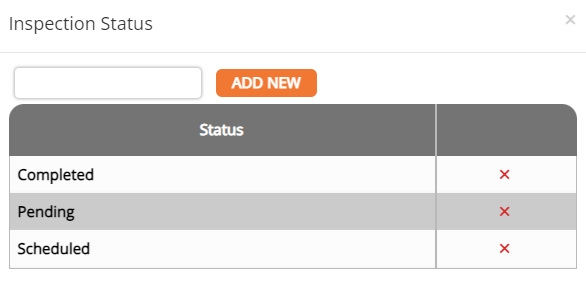
1. To add an Inspection Status, click Inspection Status button from the sub-menu.
2. Enter in the inspection status title and click Add New.
Inspection Requests
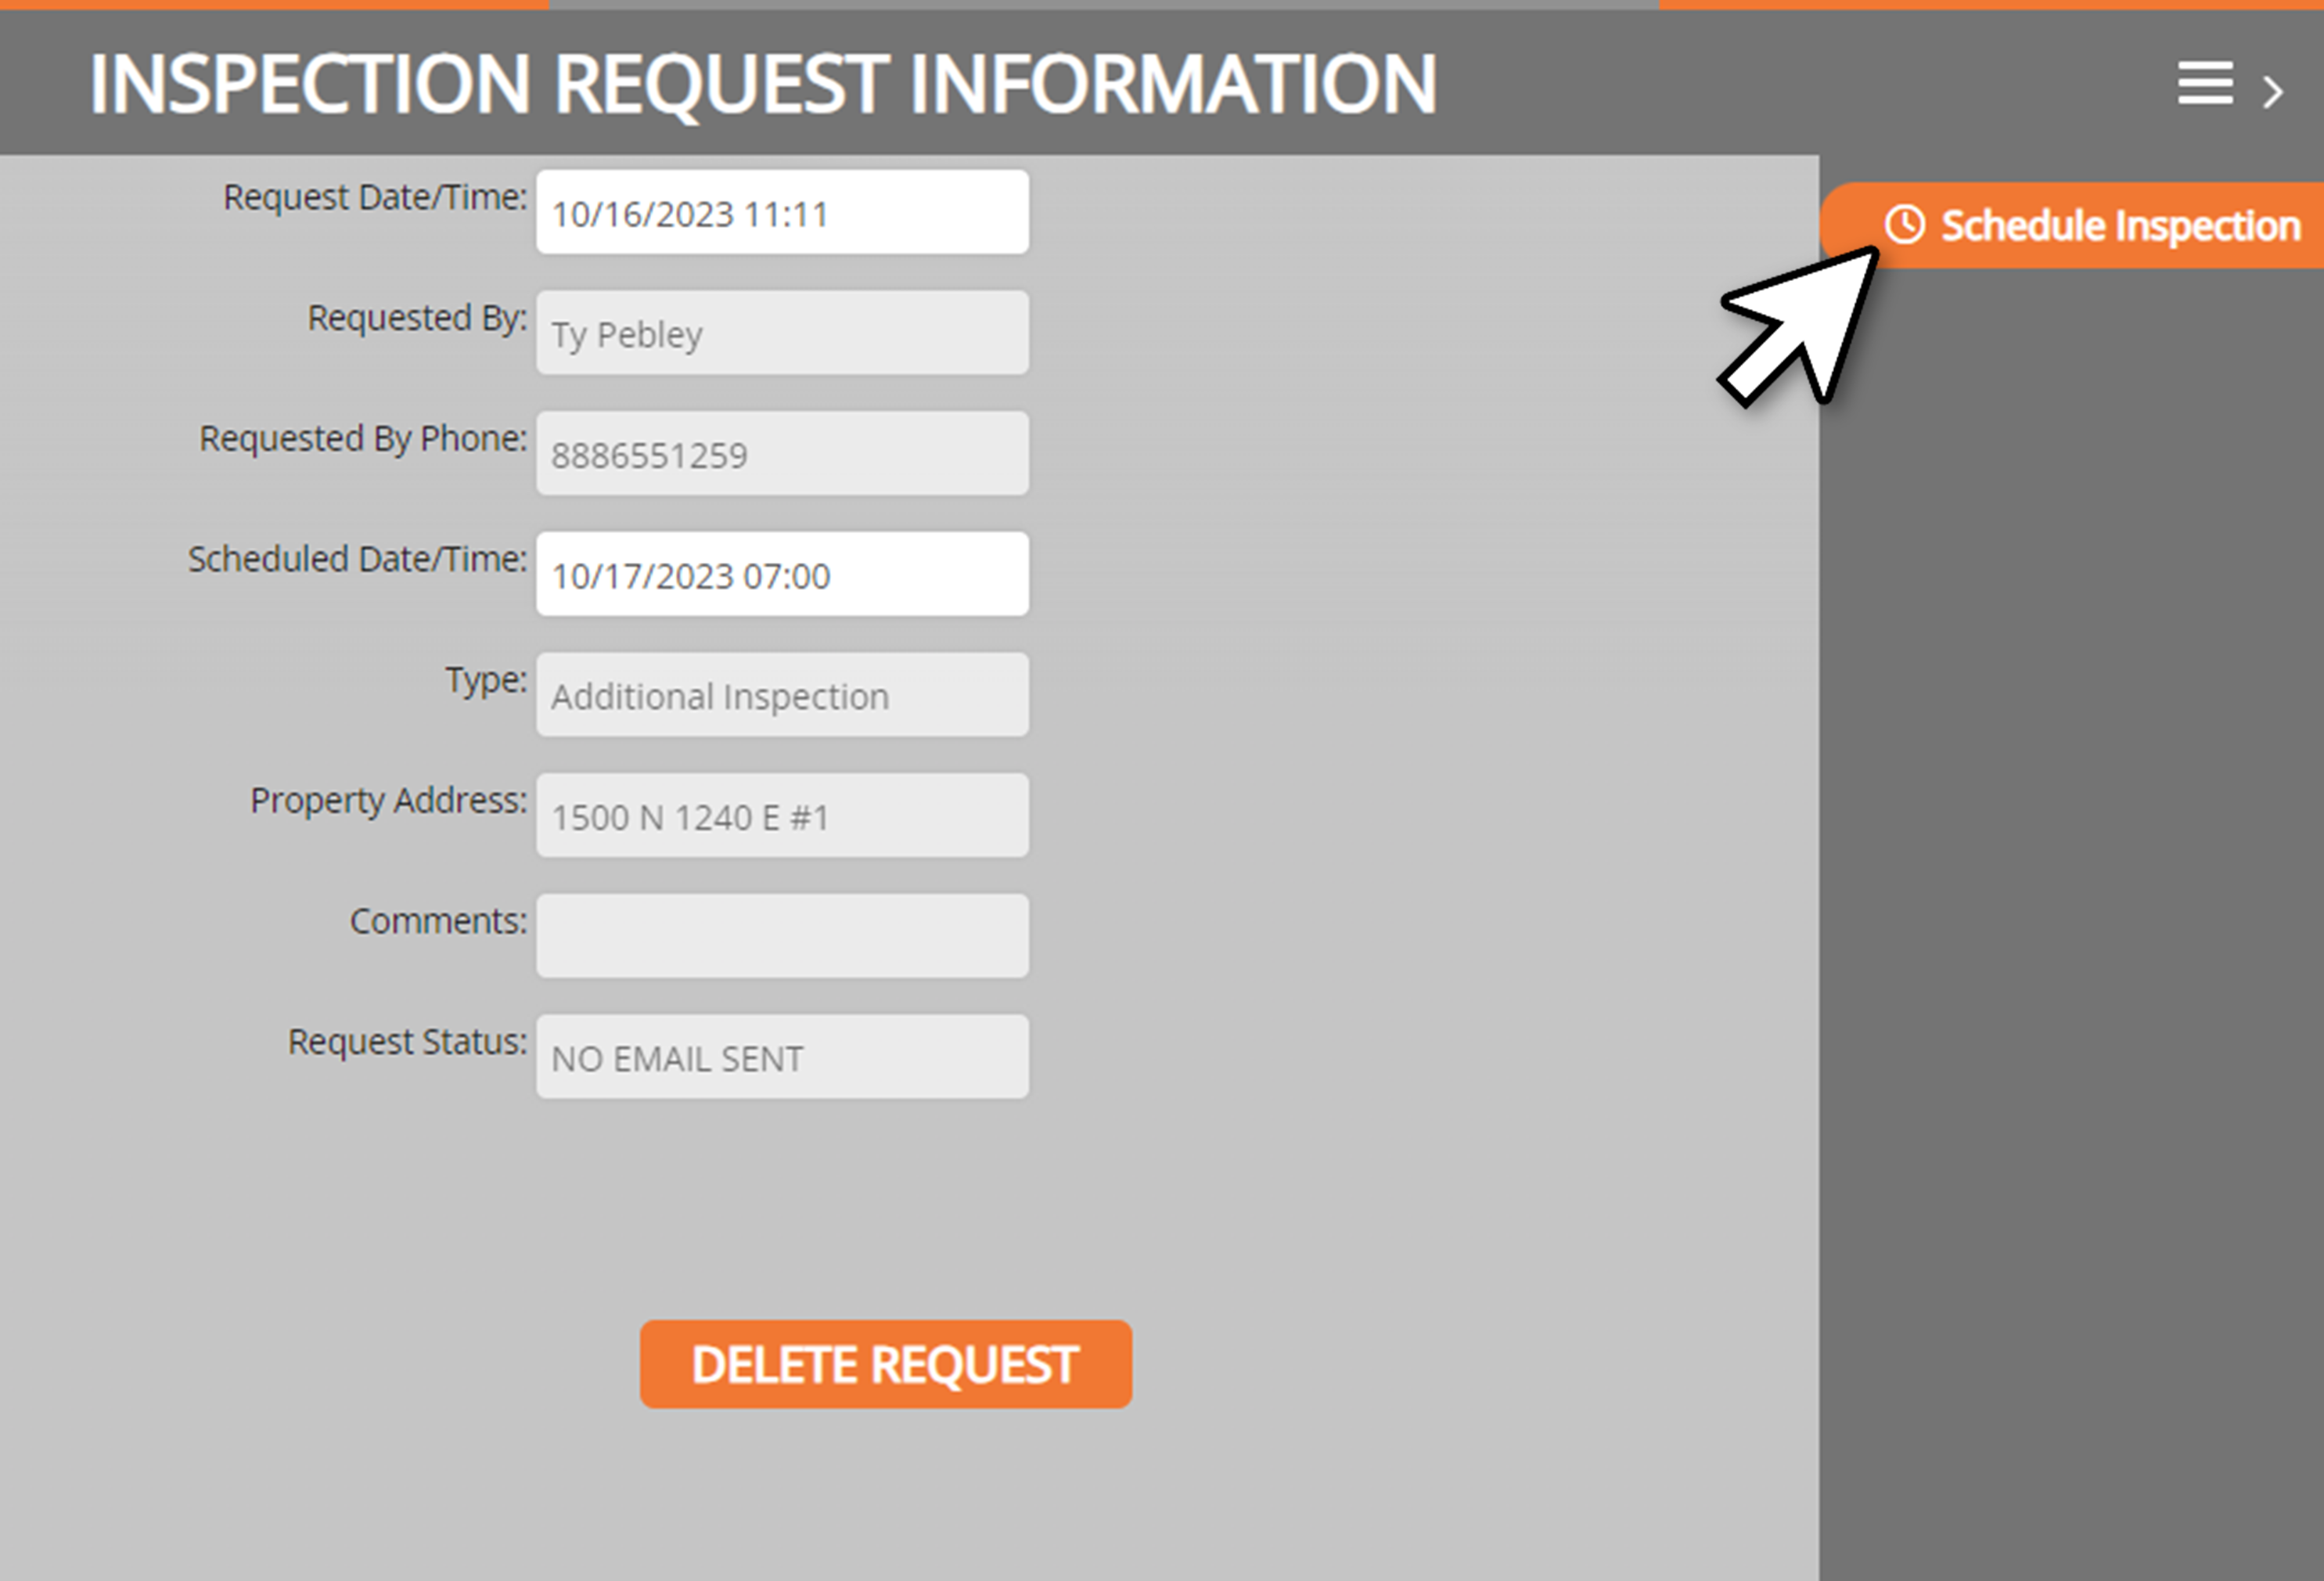
From the Inspection Requests page, you can view all the inspection requests, filter by a specific timeframe, print information, or search for a specific request.
1. To schedule an inspection from a request, select the desired inspection by clicking on the correlating row.
2. Click on the Schedule Inspection button from the side menu.
